Hello, fellow yarn enthusiasts! Get ready to fall in love with autumn all over again because we’ve got a treat for you: the Cutest Crochet Pumpkin Free Pattern! These little darlings are an absolute dream, featuring a wonderfully rounded shape adorned with delicate crochet stitches that create a lovely textured finish. Imagine them scattered across your mantelpiece, nestled amongst your fall décor, or even brightening up your desk!
Whether you’re just dipping your toes into the magical world of crochet or you’re a seasoned crafter looking for a quick and adorable project, this pattern is perfect for you! They also make the sweetest handmade gifts for friends and family. In this super-helpful tutorial, complete with a step-by-step video, you’ll learn how to easily create these pumpkins from start to finish. So grab your hook and some cozy yarn, and let’s get crafting!

Bring Cozy Vibes Home: Craft Your Own Cutest Crochet Pumpkin!
As the leaves begin to paint the world in warm hues of orange and gold, and the air takes on a crisp, refreshing chill, our minds naturally drift towards all things cozy and autumnal. What better way to embrace the season than by crafting your very own adorable crochet pumpkin? This pattern isn’t just a project; it’s an invitation to slow down, unwind, and fill your home with handmade charm. Whether you’re a seasoned crocheter looking for a quick and delightful make, or a complete beginner eager to dive into the wonderful world of yarn, this tutorial is for you. Get ready to create a pumpkin that’s not just cute, but bursting with personality!
Choosing Your Perfect Pumpkin Palette: Yarn & Hook Recommendations
The magic of crochet truly shines when you select the right materials, and for our Cutest Crochet Pumpkin, a few key choices will make all the difference.
Yarn Choices for a Textured Treat:
The beauty of this pumpkin pattern lies in its lovely texture, and the yarn you choose will significantly contribute to that.
Weight Matters: For a wonderfully plump and huggable pumpkin, a worsted weight yarn is your best friend. This is a very common yarn weight, readily available in a vast array of colors. It strikes a perfect balance – not too bulky to overwhelm the stitches, and not too fine to lose the definition of the pumpkin shape.
Fiber Fun:
Acrylic: This is a fantastic choice, especially for beginners. Acrylic yarn is durable, affordable, easy to care for, and comes in an incredible spectrum of colors, including those perfect autumnal shades of orange, cream, and even some earthy greens for accents. Plus, it’s readily washable, making your pumpkins perfect for playful displays.
Cotton Blends: If you prefer a more natural feel and a bit more drape, a cotton blend can also work beautifully. It offers breathability and a lovely softness.
Wool: For a truly luxurious and natural look, consider wool. It has wonderful elasticity and a cozy warmth. Just be mindful of the care instructions if you choose wool.
Color Inspiration: The classic choice is, of course, a beautiful orange. But don’t stop there! Think about creamy whites, deep burgundies, muted yellows, or even a vibrant teal for a more modern twist. For the stem, a brown or a green yarn will add that perfect finishing touch.
Hooking Your Way to Success:
The hook size will directly influence the gauge and density of your stitches, which is crucial for the pumpkin’s shape.
Size Guide: For worsted weight yarn, a US Size H/8 (5.0 mm) crochet hook is generally recommended. This size creates a lovely fabric that holds its shape well without being too stiff.
Material Matters (for your hands!): While metal hooks are perfectly fine, consider trying an ergonomic hook if you’re prone to hand fatigue. These often have comfortable rubber grips that make long crochet sessions much more enjoyable.
Mastering the Stitches: Your Crochet Toolkit
This pattern is designed to be accessible, relying on a few fundamental crochet stitches that form the building blocks of many beautiful projects.
Key Stitch Techniques:
Magic Ring (or Magic Circle): This is how we start many projects in the round, creating a tight, adjustable center with no visible hole. It’s a handy technique to learn early on!
Single Crochet (sc): The most basic stitch, creating a dense and firm fabric perfect for amigurumi-style projects like our pumpkin.
Single Crochet Increase (sc inc): This simply means working two single crochet stitches into the same stitch. We use this to gradually widen the pumpkin as we work.
Single Crochet Decrease (sc dec): The opposite of an increase, this stitch combines two stitches into one, helping to shape and close the pumpkin. You’ll often use a “invisible decrease” where you crochet into the front loops only of the next two stitches, which creates a neater finish.
Slip Stitch (sl st): Used to join rounds or move across stitches without adding height.
Getting Started: The Base of Your Pumpkin
The beauty of this pattern lies in its seamless construction. You’ll typically begin with a magic ring, then work rounds of single crochet, increasing at specific points to create the rounded shape. This is often worked in a continuous spiral, meaning you don’t join rounds with a slip stitch. Instead, you’ll use a stitch marker to keep track of the beginning of each round.
Tips for Beginner Crocheters: Let’s Make it Easy!
Embarking on your crochet journey can feel a little daunting, but with a few helpful pointers, you’ll be creating adorable pumpkins in no time!
Practice Makes Perfect: Before you dive into your pumpkin, grab a scrap piece of yarn and practice the single crochet stitch. Get a feel for holding the yarn and your hook, and learn how to maintain consistent tension.
Stitch Markers are Your Best Friend: Seriously, don’t underestimate the power of a good stitch marker! Use it to mark the first stitch of each round. This will save you so much frustration when trying to figure out where to start and stop.
Read Through the Pattern First: Before you even pick up your hook, read the entire pattern from beginning to end. This will give you a good overview of the steps involved and help you anticipate any tricky parts.
Don’t Be Afraid to Undo: Crocheting is a forgiving craft! If you make a mistake, it’s okay to gently pull out your stitches (this is called “frogging”) and try again. It’s all part of the learning process.
Watch the Video Tutorial! This is where the magic happens for many learners. A good video tutorial can show you exactly how to execute each stitch and technique, making it much easier to follow along.
Unleash Your Creativity: Customizing Your Crochet Pumpkin
One of the most exciting aspects of crochet is the endless potential for personalization. Your pumpkin can be as unique as you are!
Color Play: Beyond the Classic Orange
Ombre Effect: Use different shades of the same color, gradually transitioning from light to dark (or vice-versa) as you crochet.
Stripes: Introduce contrasting colors every few rounds for a fun, playful look. Think cream and orange, or even a deep purple and a muted gold.
Patchwork: If you’re feeling adventurous, use a variety of smaller yarn scraps in different colors to create a truly unique, bohemian-inspired pumpkin.
Gauzy Texture: Try using a lighter weight yarn held double with a lighter fiber, or even a lace-weight yarn held along with your main yarn, for a more delicate, airy pumpkin.
Size Matters: From Tiny Treats to Statement Pieces
The beauty of crochet is that you can easily adjust the size of your project.
Smaller Pumpkins: Use a smaller hook and potentially a lighter weight yarn. You’ll also need to work fewer increase rounds and possibly fewer single crochet rounds before starting the decrease rounds.
Larger Pumpkins: Use a larger hook and potentially a heavier weight yarn. You’ll want to add extra increase rounds and single crochet rounds to accommodate the larger size. Remember to adjust your stuffing accordingly!
Adding Embellishments: The Finishing Touches
Stems: Experiment with different stem styles! You can crochet a simple i-cord, a few coils of brown or green yarn, or even use a small twig or cinnamon stick for a natural touch.
Leaves: Crochet small leaf shapes in green or fall colors and stitch them onto the stem.
Vines: Add crocheted vines that curl around your pumpkin.
Embroidery: Use embroidery floss to add stitched details like eyes, a mouth, or even a cute little embroidered face for a “boo!” factor.
Buttons or Beads: Add decorative buttons or beads around the base for a touch of sparkle or whimsy.
Keeping Your Pumpkin Looking Its Best: Care Instructions
Your handmade treasures deserve a little love to stay looking their best.
Washing: For acrylic yarns, you can generally machine wash your pumpkin on a gentle cycle with cold water. It’s best to place it in a mesh laundry bag to prevent it from snagging or deforming.
Drying: Never put your crochet pumpkin in the dryer! The heat can cause acrylic fibers to melt and deform. Instead, gently reshape your pumpkin and lay it flat on a clean towel to air dry. You can also place it on a drying rack.
Spot Cleaning: For minor spills or dust, a damp cloth with a tiny bit of mild soap can work wonders for spot cleaning. Gently dab the affected area and allow it to air dry.
Storage: When it’s time to pack away your autumnal decor, store your pumpkins in a breathable bag or container to protect them from dust and pests. Avoid plastic bags, as they can trap moisture.
Project Ideas: More Than Just a Pumpkin!
Once you’ve mastered the basic pumpkin, the possibilities are endless! This pattern is incredibly versatile.
Fall Decor Galore: Create a whole collection of pumpkins in various sizes and colors to adorn your mantelpiece, coffee table, or shelves.
Themed Garlands: String together mini pumpkins to create a charming autumnal garland to hang across a window or doorway.
Cozy Gifts: These adorable pumpkins make thoughtful and unique gifts for friends, family, or anyone who appreciates handmade goodness.
Harvest Centerpieces: Combine your crochet pumpkins with real gourds, fall foliage, and candles for a stunning harvest-themed centerpiece.
Seasonal Amigurumi: Use the same technique to create other seasonal shapes! Think apples, pears, or even little crochet ghosts for Halloween.
Creating your Cutest Crochet Pumpkin is more than just a craft project; it’s an act of love and a way to bring warmth and personality into your home. So grab your yarn, pick up your hook, and let the cozy crafting begin! Happy crocheting!
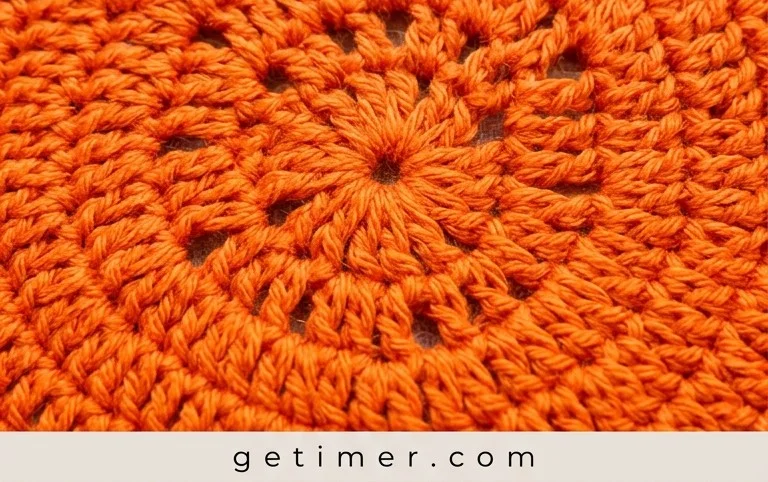
And there you have it – your very own adorable crochet pumpkin, ready to add a touch of handmade charm to your autumn decor! I truly hope you enjoyed this free pattern and found the tutorial helpful. Don’t hesitate to grab your hook and yarn and give this project a try; it’s a wonderfully quick and rewarding make!
I’d be absolutely delighted to see your finished pumpkins! Feel free to share your creations on social media using #CrochetPumpkinLove and tag us – we can’t wait to be inspired! Feel adventurous? Consider experimenting with different yarn colors for a rainbow pumpkin patch, or adding a contrasting stem color. And if you’re looking for more delightful crochet projects, be sure to explore the rest of our pattern library for your next crafting adventure!